HOME WINDOW
In the Home window, you can create medical prescriptions for your patients. Each prescription can include up to 5 medications. You can also scan physical prescriptions and convert them into a digital version.
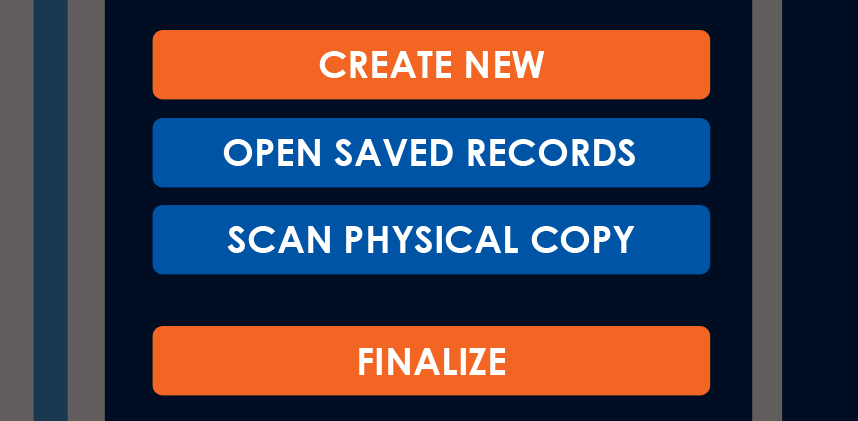
- To create a new prescription, select the Create New button on the Action Sidebar.
- To open a previously saved, unissued prescription, select Open Saved Records.
- By default, after logging into the application, the Home window loads the last saved instance of a previous prescription (if any), allowing you to continue where you left off. You can disable this feature in the options.
NOTES
- Access to the Daley Dose application requires an active subscription.
- Your device must be connected to the internet to send digital prescriptions.
INTERFACE DETAILS
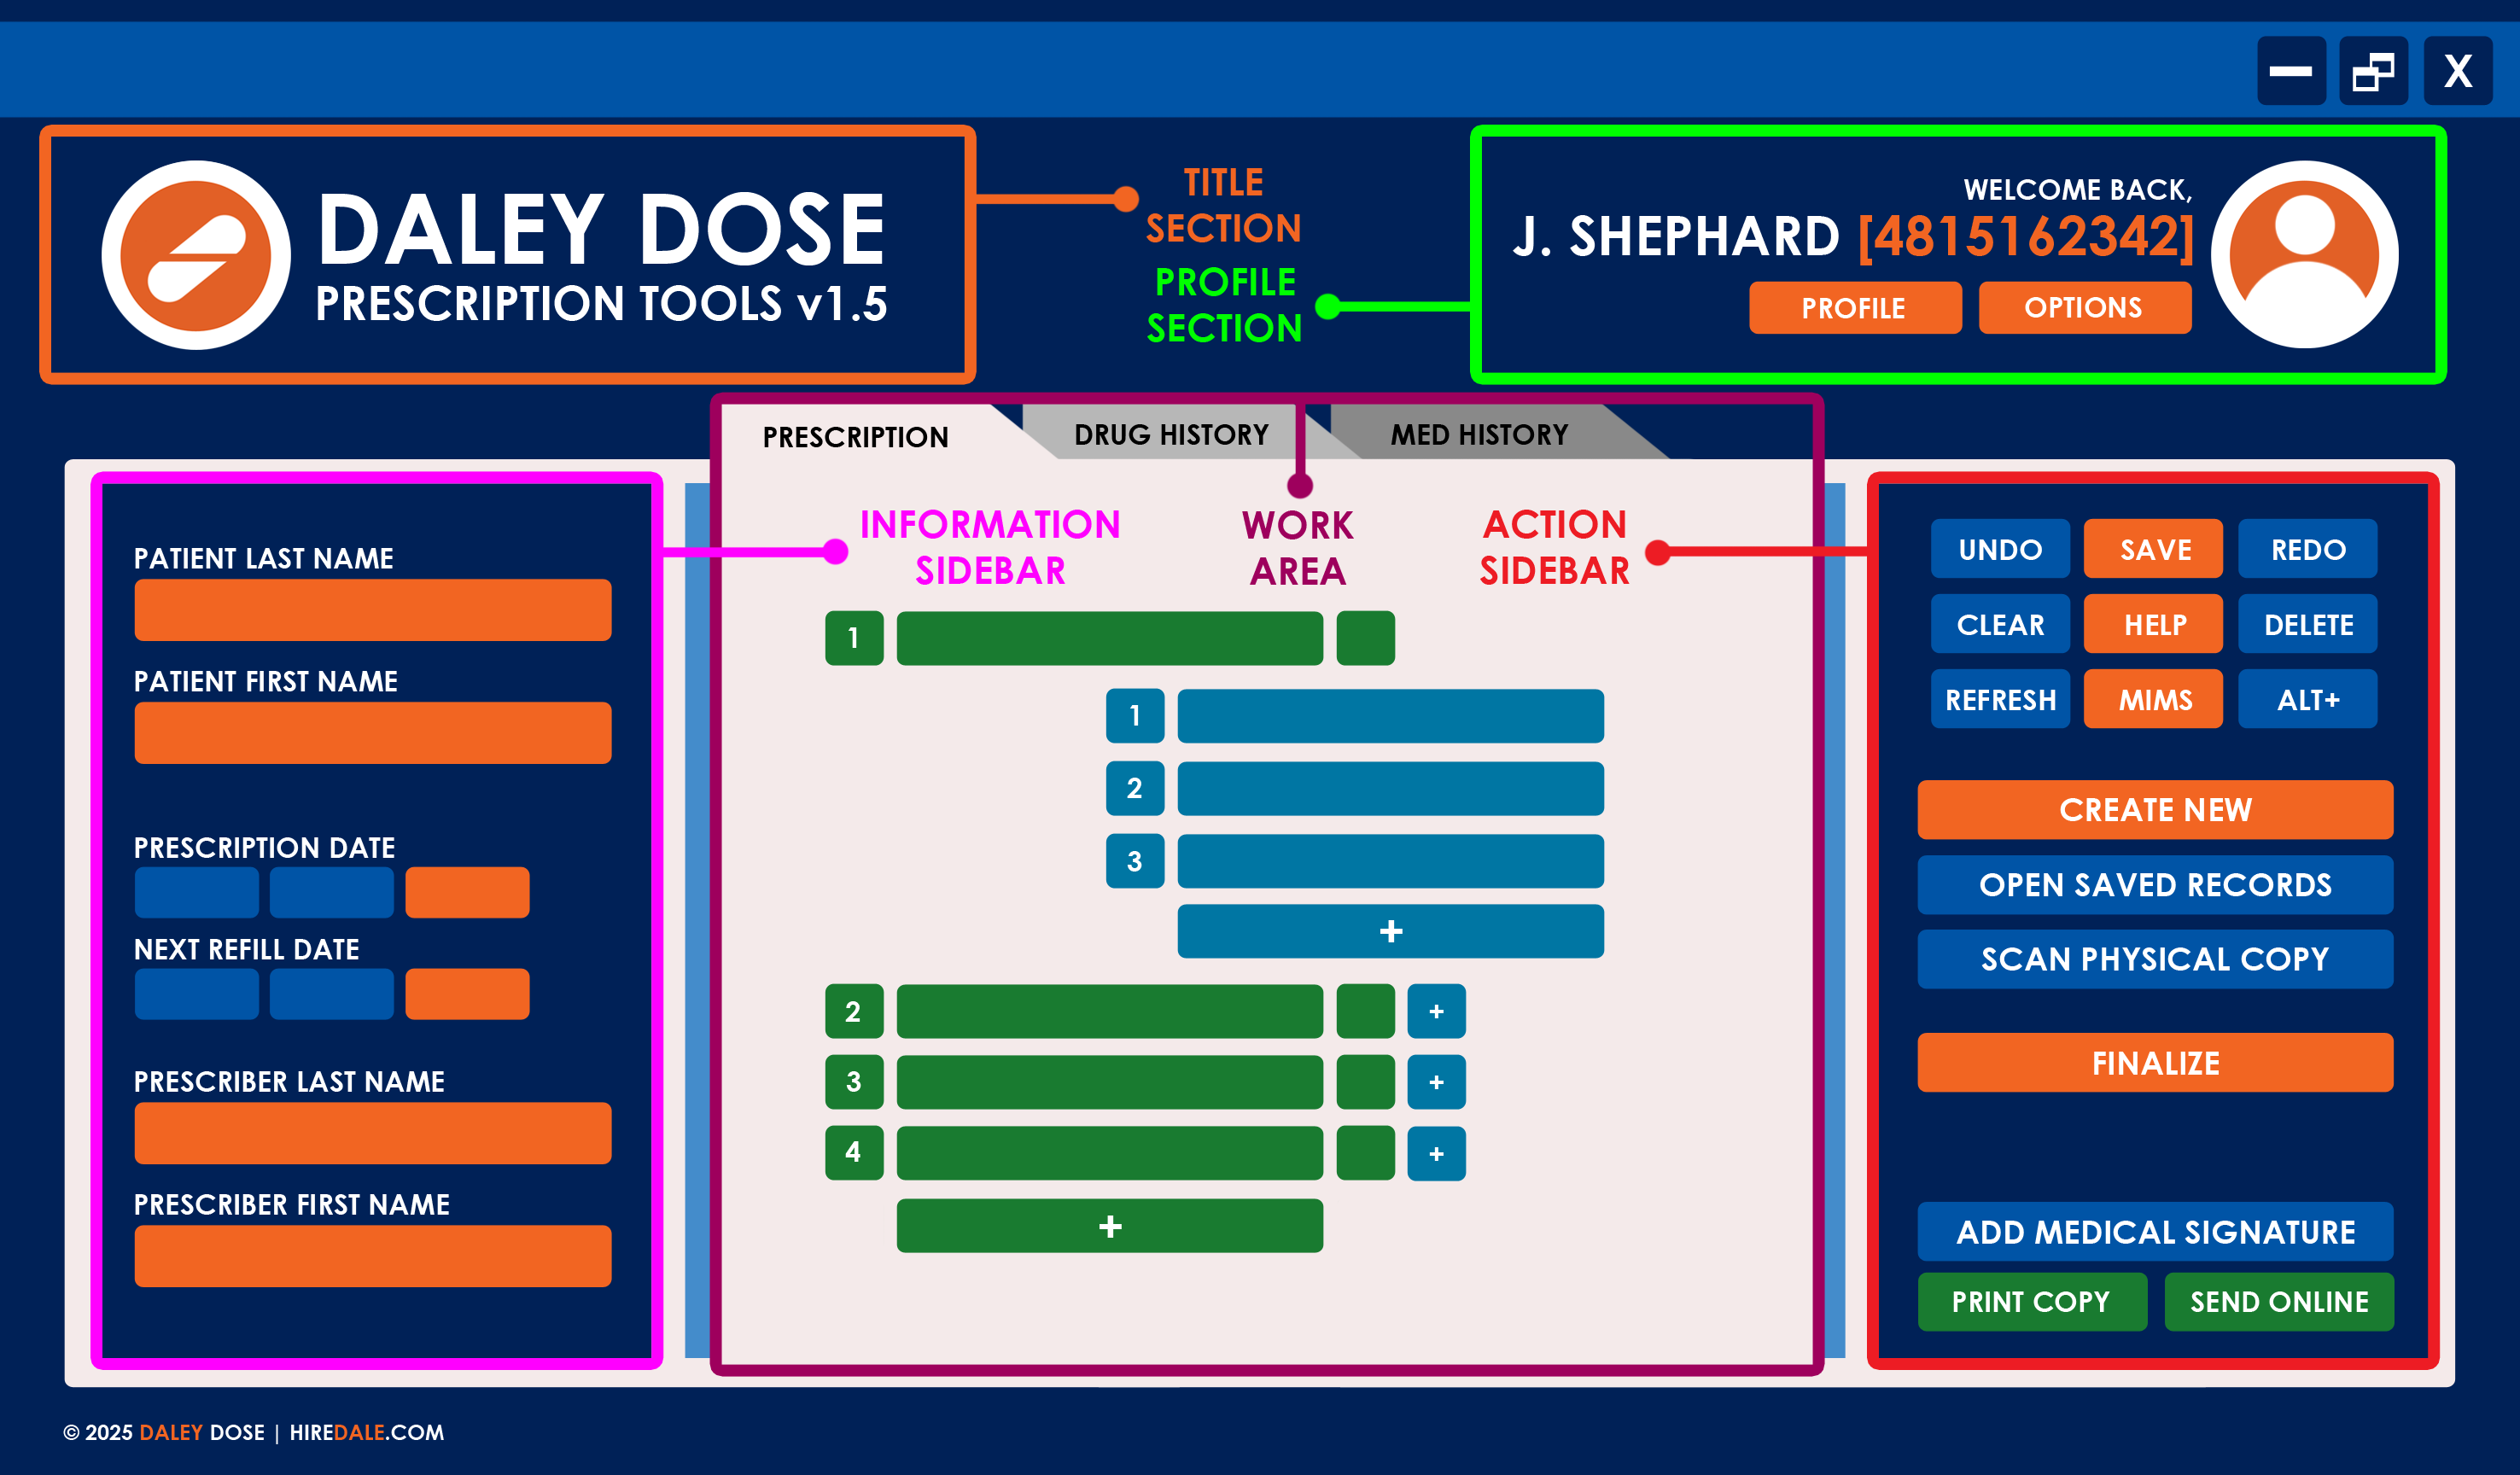
The Home window is composed of the Title Section, Profile Section, Information Sidebar, Action Sidebar, and Work Area.
Most of the interface remains the same throughout the prescription‑making process. Only the middle section, referred to as the Work Area, changes depending on the current window or tab accessed.
TITLE SECTION
The Title Section is located in the top‑left corner of the screen.
It contains the Daley Dose name, logo, and version number.

The following table describes the buttons in the Title Section:
| BUTTONS | DEFINITION |
|---|---|
| DALEY DOSE ICON | Select the Daley Dose icon to view the System Information pop‑up window. The application displays detailed information about the program, including its complete version number, release date, and a list of developer notes added in the build. |
PROFILE SECTION
The Profile Section is located in the top‑right corner of the screen.
You can view your profile information and access in‑app settings here. This section also displays a greeting during an active session, showing the current active Prescriber and their system‑assigned ID.

The following table describes the buttons in the Profile Section:
| BUTTONS | DEFINITION |
|---|---|
| PROFILE ICON | Select to view the Profile Summary pop‑up window. The application displays detailed information about the user currently logged in, such as their professional license number, specialization, and any prescription restrictions, as well as their duration. |
| PROFILE | Select to view the active profile’s information, role, prescription restrictions, form templates, and saved security settings. When you select this button, the application opens the profile settings. |
| OPTIONS | Select to view the application’s options. |
INFORMATION SIDEBAR
The Information Sidebar is located on the left side of the screen.
It displays details about the patient, the prescribing doctor, and the current prescription. You cannot add medications to the current prescription while these fields are empty.
The following table describes the fields in the Information Sidebar:
| FIELDS | DEFINITION |
|---|---|
| PATIENT LAST NAME | Displays the patient’s last name. Select to enter or edit the current patient’s name. NOTES: – The application prevents adding medications and notes when the Patient Name fields are empty. – Entering a Patient Last Name restricts options for Patient First Names to those with an existing record in the database. |
| PATIENT FIRST NAME | Displays the patient’s first name. Select to enter or edit the current patient’s name. |
| PRESCRIPTION DATE | Displays the prescription’s issue date. Select to enter or edit the current prescription date. NOTE: The application displays the date in [MM/DD/YYYY] format. |
| NEXT REFILL DATE | Displays the prescription’s scheduled refill date. Select to enter or edit the current scheduled refill date. NOTE: The application displays the date in [MM/DD/YYYY] format. |
| PRESCRIBER LAST NAME | Displays the prescribing user’s last name. NOTE: This is a read‑only field. The prescriber information is based on the current user logged into the application. |
| PRESCRIBER FIRST NAME | Displays the prescribing user’s first name. NOTE: This is a read‑only field. The prescriber information is based on the current user logged into the application. |
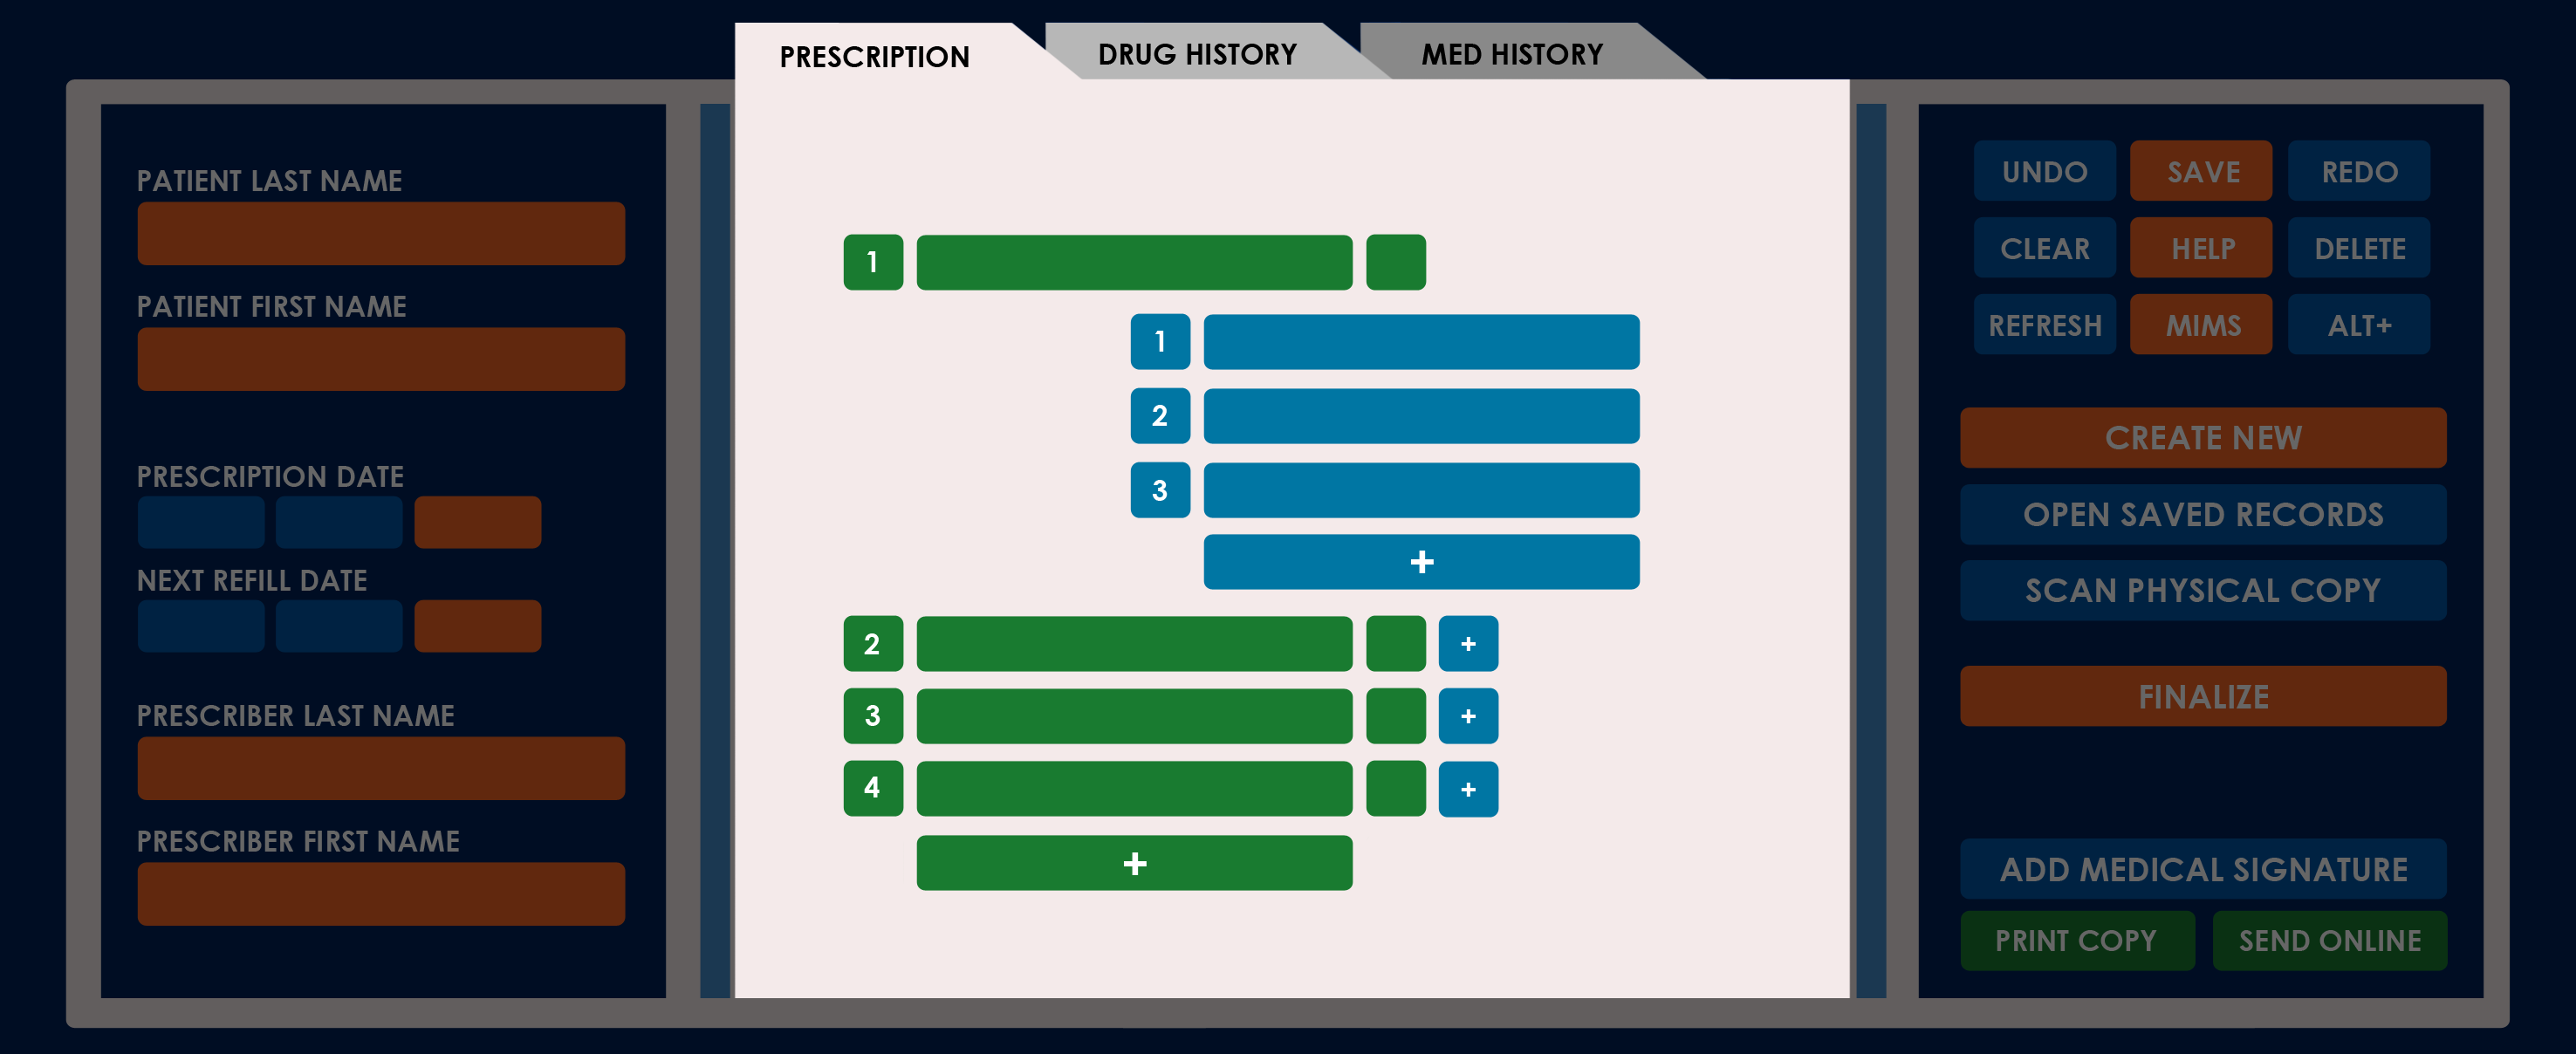
ACTION SIDEBAR
The Action Sidebar is located on the right side of the screen.
It displays the buttons to create and manage prescriptions. These buttons are divided into three categories: Utility, Main, and Generate.
For simplicity, this guide presents the button definitions by category.
UTILITY
The Utility buttons enable you to manage individual prescription entries and access in‑app references, including the help files and the latest Monthly Index of Medical Specialities (MIMS) edition.
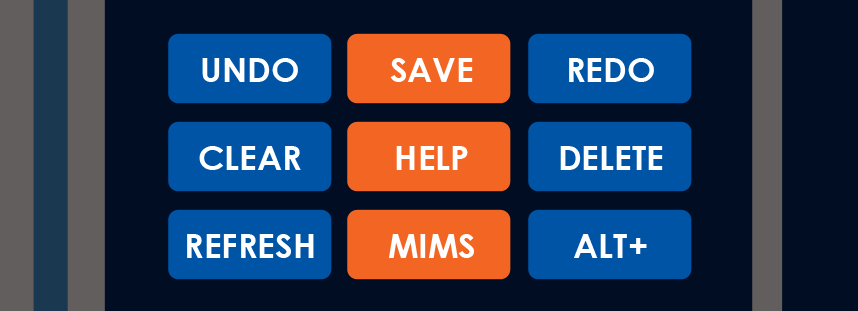
The following table describes the Utility buttons in the Action Sidebar:
| BUTTONS | DEFINITION |
|---|---|
| UNDO | Select to undo the last action performed in the current prescription. |
| SAVE | Select to save the current prescription. The application automatically displays the saved prescription the next time you log in. You can view a list of saved prescriptions using the Open button. NOTE: Saved prescriptions are removed from the system. |
| REDO | Select to redo the last action undone in the current prescription. |
| CLEAR | Select to clear the current prescription entry’s contents. |
| HELP | Select to access an in‑app version of the latest Daley Dose Help Files. NOTES: – The help files automatically open the entry about the current window. – You can also view the latest version of the help files on the Daley Dose website. |
| DELETE | Select to open or close Delete Mode, which allows you to mark existing entries in the prescription for deletion. NOTE: The application displays the confirmation message “Are you sure you want to delete these from the prescription?” before removing the selected entries from the list. |
| REFRESH | Select to refresh the contents of the current session to match any saved instances or records in the database. This includes the contents of the patient’s Drug History and Medical History tabs. |
| MIMS | Select to access an in‑app version of the latest Monthly Index of Medical Specialities (MIMS) digital handbook, the most common drug reference for healthcare professionals. NOTE: The MIMS version is updated along with every Daley Dose version. |
| ALT+ | Select to add an alternative option for the pharmacy if the prescribed medication is not available. When you select this button, the application opens the Add Alternative window. NOTE: The application auto‑completes generic and brand name suggestions for each medication. You can turn off this feature in the options. |
MAIN
The Main buttons enable you to add, edit, or finalize prescriptions. The application disables the Finalize button if it detects an issue with any of the current prescription items.
The following table describes the Main buttons in the Action Sidebar:
| BUTTONS | DEFINITION |
|---|---|
| CREATE NEW | Select to create a new prescription. When you select this button while there are items on the current prescription, the application displays the confirmation message “Are you sure you want to erase the current prescription?” The application erases all populated fields when you select Yes. |
| OPEN SAVED RECORDS | Select to open and edit a previously saved prescription. |
| SCAN PHYSICAL COPY | Select to scan a handwritten prescription and create a digital version in a new prescription window. When you select this button, the application opens the Scan window. NOTES: – The application displays this button on the desktop version only when your computer has a confirmed connected webcam. – The application always displays this button on the mobile app. |
| FINALIZE | Select to finalize the current prescription. When you select this button, the application locks the contents of the current prescription and enables the Add Medical Signature, Print Copy, and Send Online buttons. |
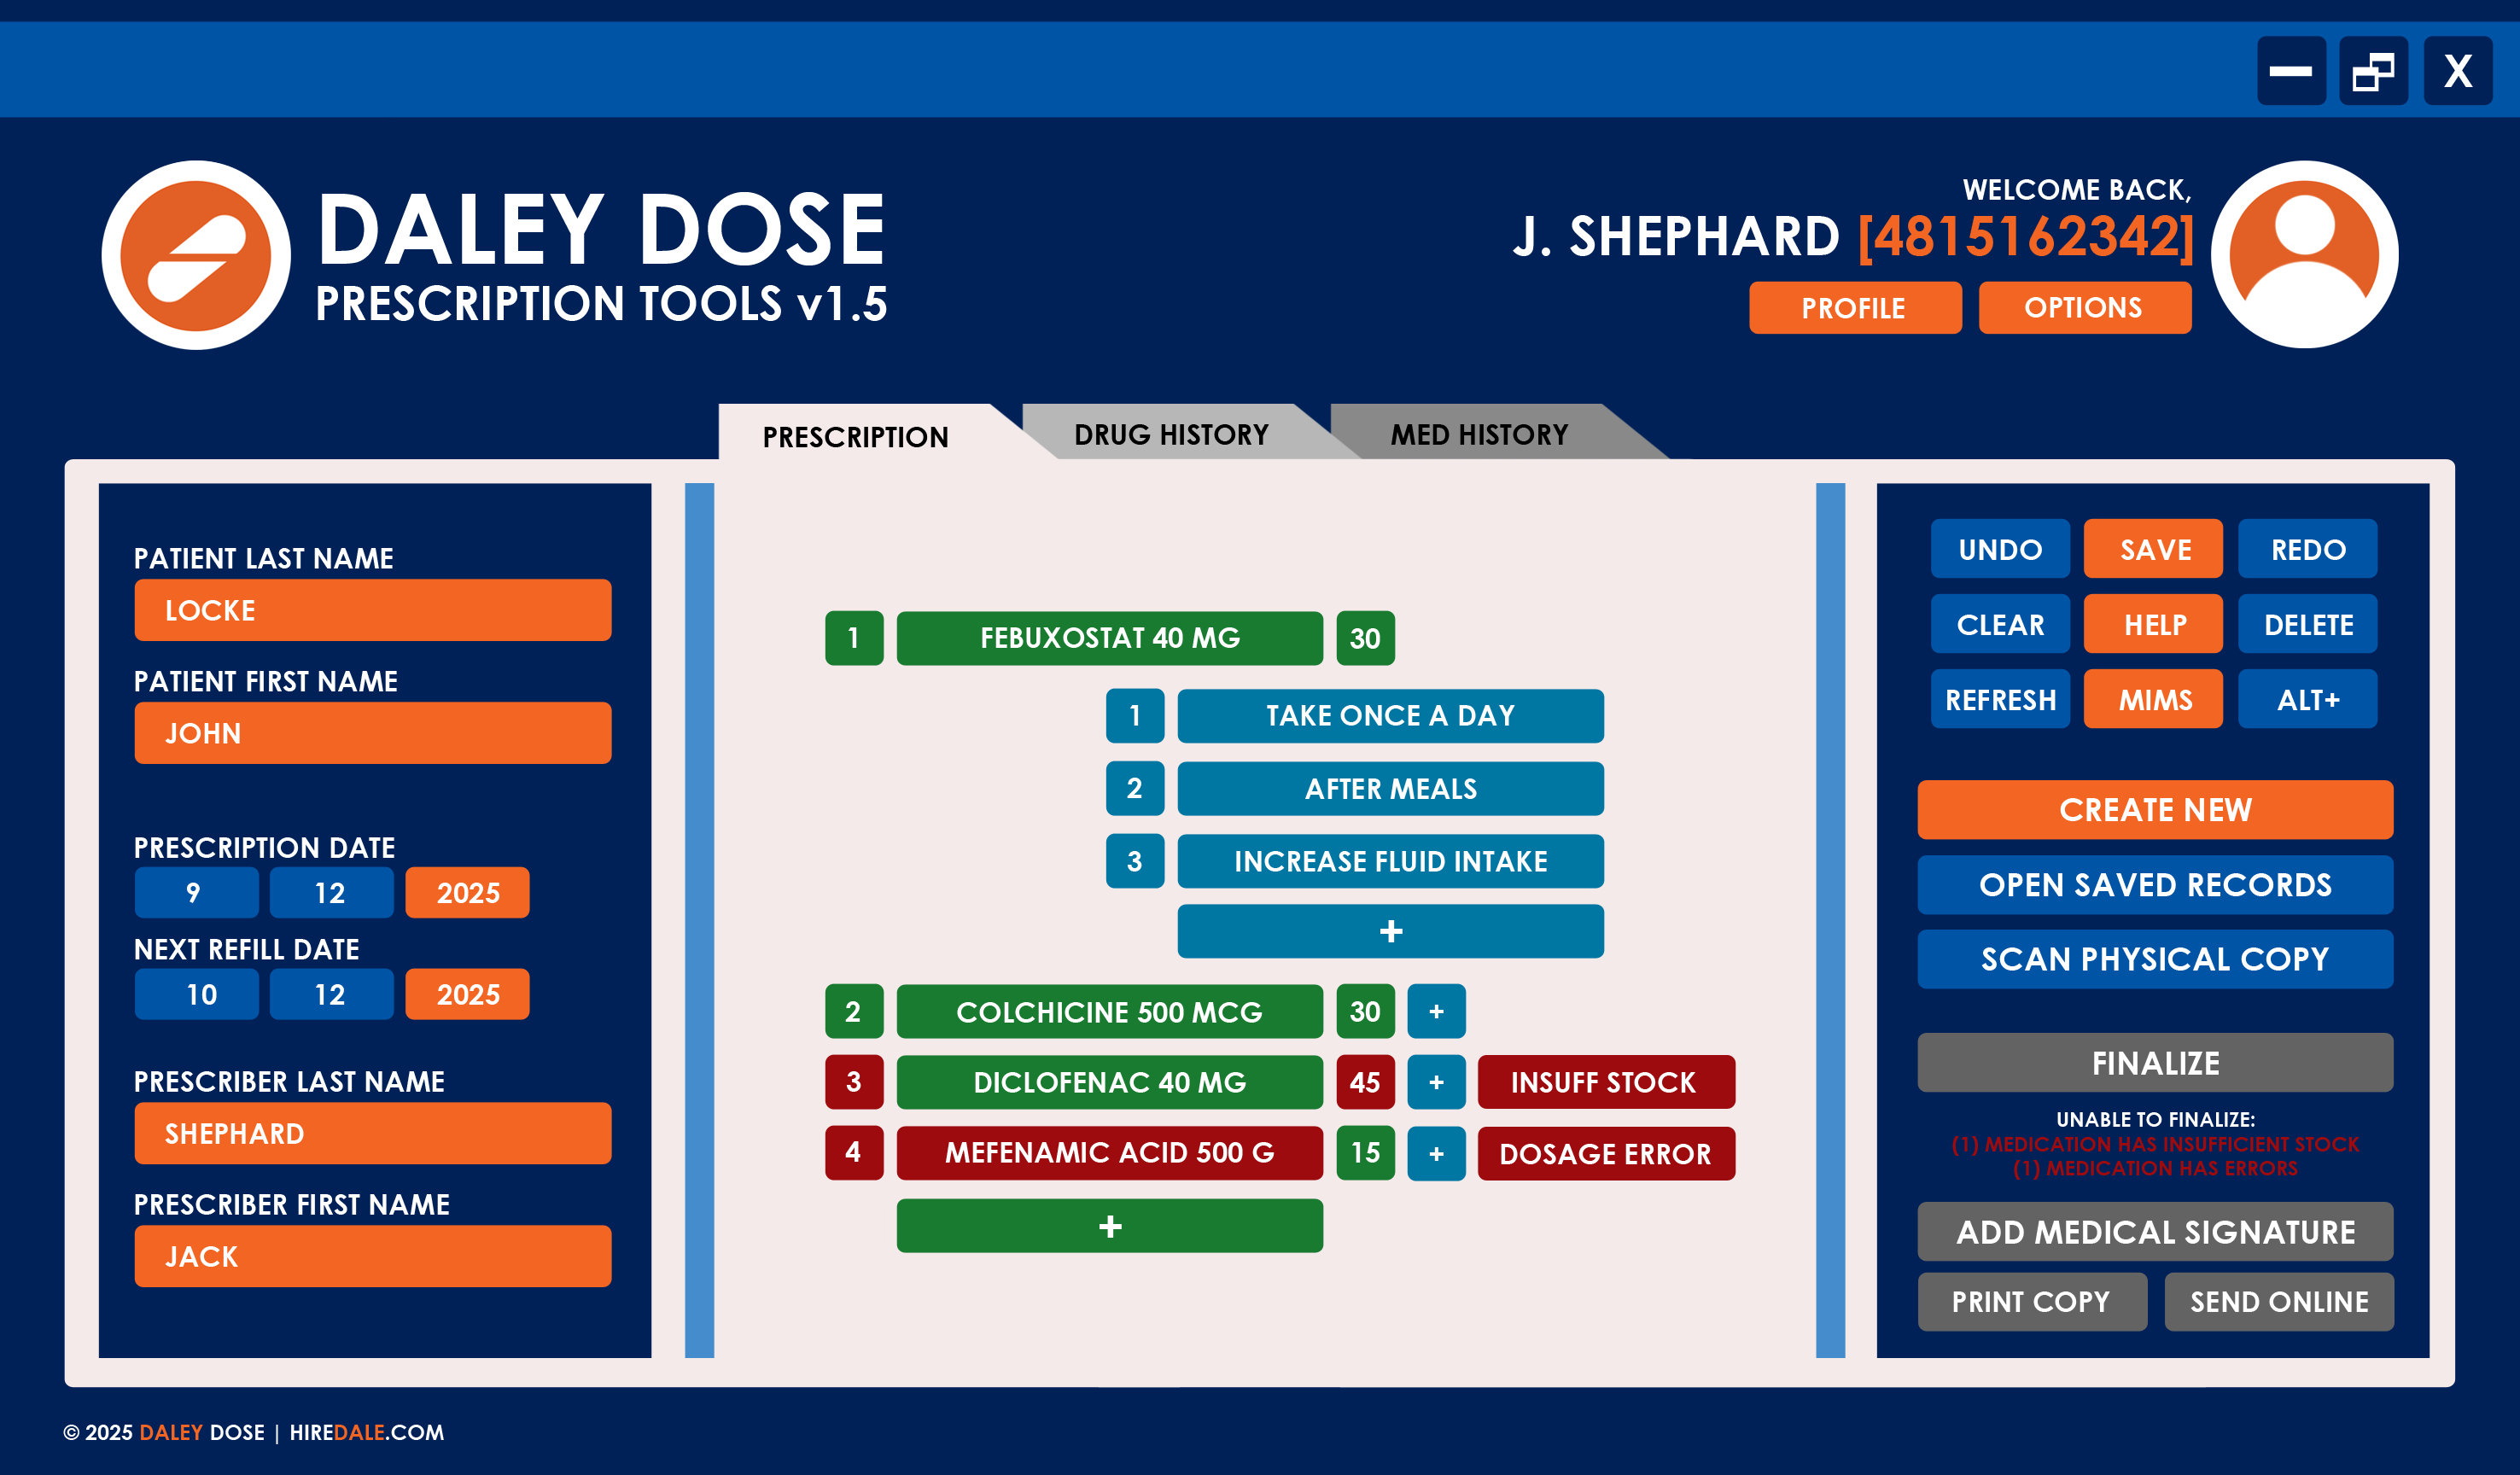
GENERATE
The Generate buttons enable you to sign, print, and send the current prescription. These buttons are locked by the system to prevent errors when issuing prescriptions.
To unlock the Generate buttons, you must first select the Finalize button.

The following table describes the Generate buttons in the Action Sidebar:
| BUTTONS | DEFINITION |
|---|---|
| ADD MEDICAL SIGNATURE | Select to add your official medical signature to the prescription. This field is required to finalize the prescription. NOTE: You must have a medical signature template saved in your profile to use this functionality. |
| PRINT COPY | Select to print the current prescription on a local printer. NOTES: – This option is available only on devices with a confirmed connection to a printer. – This feature is not available on the Daley Dose mobile app. |
| SEND ONLINE | Select to send the prescription to the Daley Dose database for deployment. NOTE: The application displays the confirmation message “Finalize and send out this prescription?” before sending. |
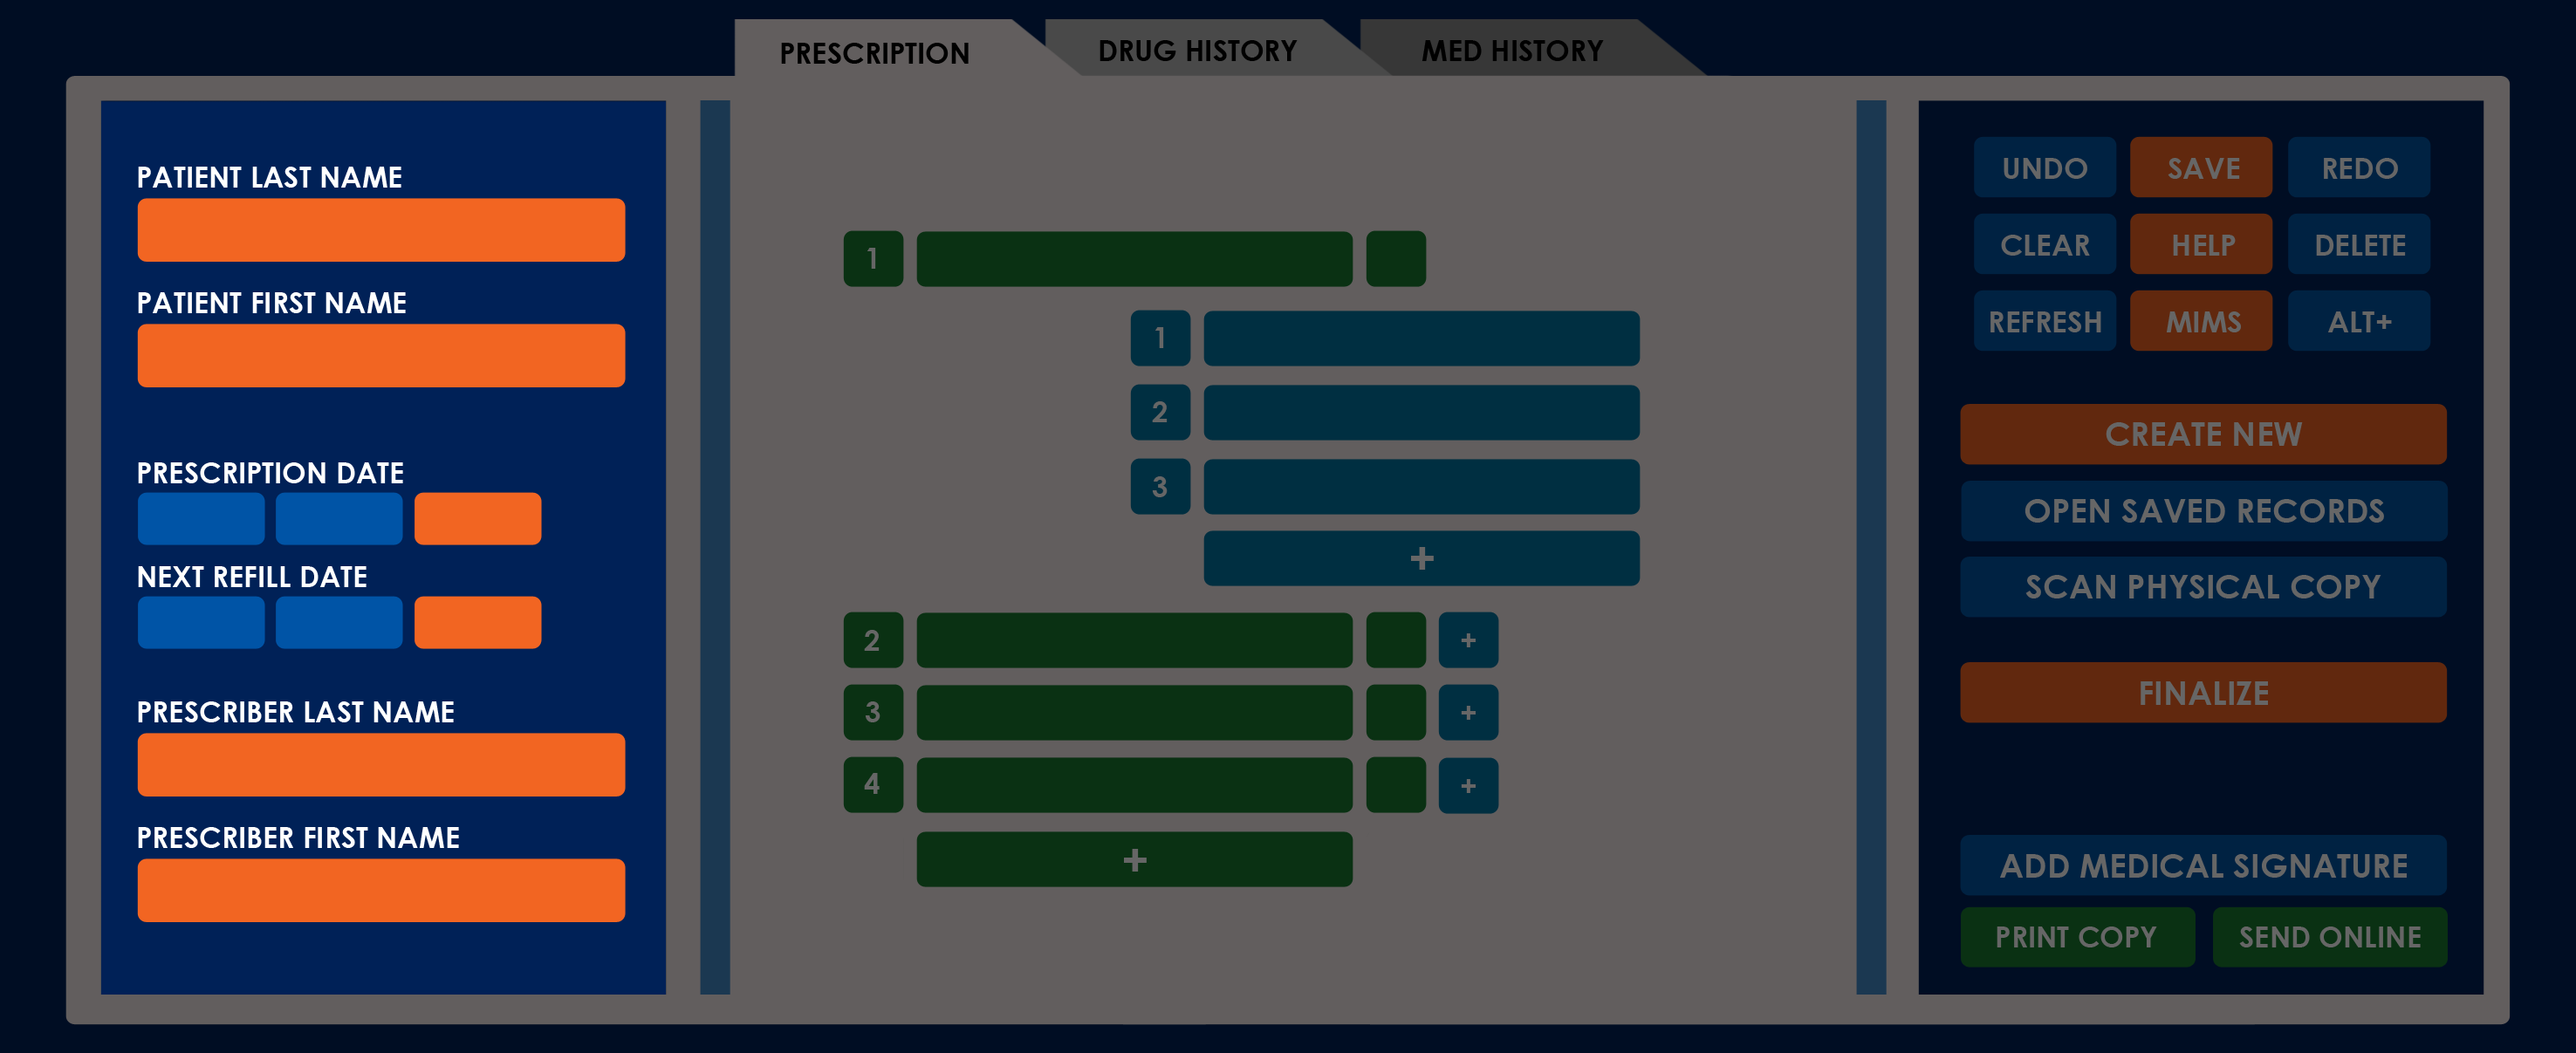
WORK AREA
The Work Area is where you create, review, and finalize prescriptions. It occupies the center of the screen and contains three tabs:
- Prescription — Enables you to build a prescription by adding medications and notes.
- Drug History — Displays the patient’s digitized prescription history from the past 20 years.
- Med History — Displays the patient’s digitized medical conditions and treatments from the past 20 years.
These tabs work together to provide a complete view of the patient’s treatment plan. You can learn more about each tab on their individual entries.
RELATED TOPICS
- You must have a Prescriber role to create prescriptions. See User Roles for more information.
- An Administrator or Support user can impose or remove a prescription restriction on a Prescriber. See Prescription Restrictions for more information.